Many small-scale worm farmers struggle to grow their vermicompost production beyond a few bins. We faced this same challenge in our early days and learned that proper scaling requires careful planning and system design.
Our guide will show you practical steps to expand your worm farming operation without common pitfalls like odour issues or worm die-offs. With a cuppa in hand and some patience, you can turn your modest worm farm into something quite remarkable.
The journey isn’t always straightforward – we’ve had our share of soggy bedding and escaped worms! – but vermicompost production can indeed be profitable with the right approach and a bit of British perseverance.
Benefits of Scaling Up Vermicompost Production
We see amazing results when farmers grow their worm compost operations. Scaling up creates more nutrient-rich soil that boosts crop yields and fights plant diseases. Our larger systems produce compost full of nitrogen, phosphorus, potassium, and vital micronutrients plants need to thrive.
This organic fertilizer improves soil in ways chemical products cannot – it adds helpful microbes that break down minerals for plants to use easily.
The true value of vermicompost lies not just in what it adds to soil, but in how it transforms the entire growing environment.
Large-scale worm composting offers practical benefits too. The finished product helps soil hold water better and creates air pockets for root growth. It makes toxic metals in soil less harmful to plants.
Eco-friendly farmers love how this sustainable approach turns waste into a valuable resource. Next, we’ll explore the key things to think about before you expand your vermicomposting system.
Key Considerations for Large-Scale Vermicomposting
Large-scale vermicomposting needs careful planning and proper setup. You must think about worm types, climate control, and the right food sources.
Suitable worm species for large systems
We find that choosing the right worm species makes all the difference in large systems. Red wigglers (_Eisenia fetida_) stand out as the top choice for scaled-up vermicomposting. These hardy creatures adapt well to various conditions and reproduce quickly, which helps build your worm population fast.
_Eisenia fetida_ is particularly resilient and widely distributed, making it perfect for commercial operations in many regions.
Other good options include European nightcrawlers (_Eisenia hortensis_) and African nightcrawlers (_Eudrilus eugeniae_) for warmer climates. Each species processes organic matter at different rates and thrives under specific temperature ranges.
The worms you select must match your local climate and the type of waste you plan to compost. Next, we’ll explore how climate and temperature management affect your vermicomposting success.
Climate and temperature management
Temperature control stands as a vital factor in large-scale vermicomposting success. Our worms thrive best in temperatures between 15-25°C (59-77°F), which creates the perfect environment for them to process organic waste.
They can survive at temperatures as low as 10°C (50°F), but their activity slows down significantly. Too much heat above 30°C can harm or kill your worm population, so proper climate regulation becomes essential.
The secret to successful vermicomposting lies in maintaining the sweet spot of 15-25°C where worms work most efficiently.
For outdoor systems, we need to plan for seasonal changes. This might mean adding insulation during winter months or creating shade structures for summer. Indoor facilities offer more stable conditions but require good air flow to prevent overheating.
Monitoring systems help track temperature fluctuations, allowing quick adjustments before problems arise. Consistent temperature management ensures optimal microbial activity and speeds up the biological decomposition process.
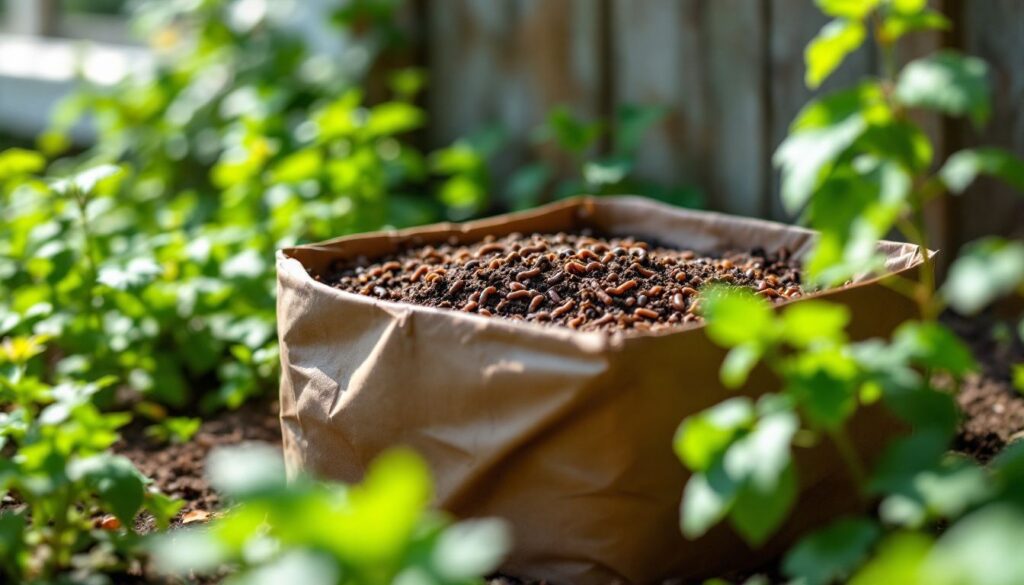
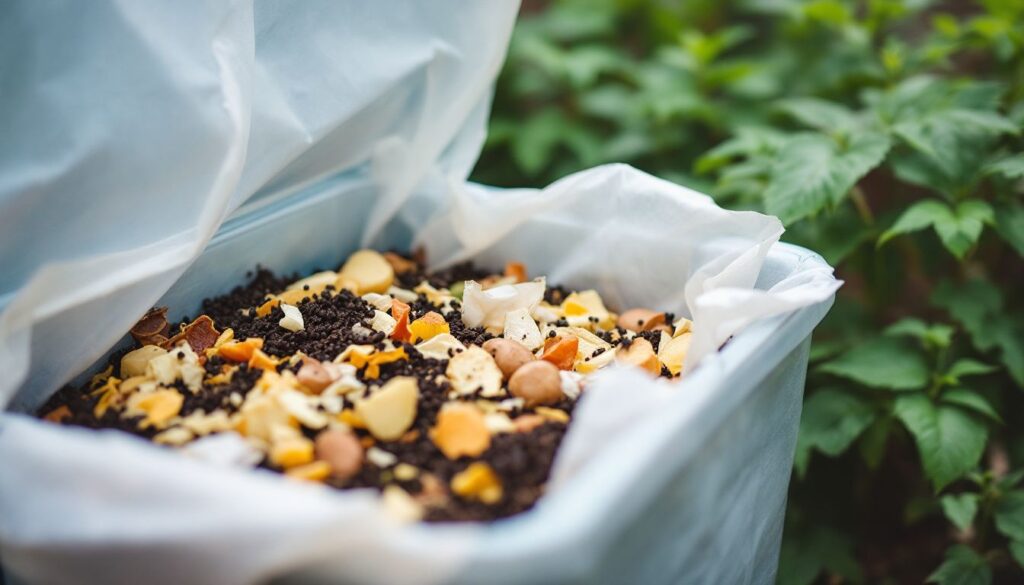
Feedstock selection and preparation
After managing climate and temperature for our worms, proper feedstock becomes our next focus. We need to select organic waste materials that earthworms will thrive on. Fruit peels, vegetable scraps, coffee grounds, and aged manure make excellent choices for large-scale operations.
These materials must be free from meat, dairy, oils, and citrus fruits which can harm worms or create bad smells.
Preparation of feedstock plays a vital role in successful vermicomposting. We chop all materials into small pieces to speed up breakdown and make them easier for worms to eat. Pre-composting feedstock for 2-3 weeks helps reduce heat and acidity before adding it to worm beds.
This step maintains the ideal pH of 7 that worms need for best growth. With moisture levels kept between 50% to 70%, our worms can multiply quickly and turn waste into valuable humus rich in microbial activity.
Designing a Large-Scale Vermicomposting System
When you scale up vermicomposting, you need a smart system design that works for your space and goals. Read on to learn how to create the perfect setup for your worm farm!
Bed method vs. container method
We’ve found that choosing the right system for scaling up vermicompost production makes a huge difference in efficiency and output. Here’s a comparison of the two main approaches used in large-scale operations:
| Feature | Bed Method (Windrow Systems) | Container Method |
|---|---|---|
| Setup | Uses bedding materials as a large bin directly on ground | Uses bins made from recycled plastic, wood, Styrofoam, or metal |
| Scale | Ideal for large-scale operations | Better for small to medium scale production |
| Cost | Cost-effective with minimal infrastructure | Higher initial investment in containers |
| Waste Management | Very effective for managing dairy waste | Limited capacity for waste processing |
| Maintenance | Requires more space but less daily attention | Needs less space but more frequent monitoring |
| Harvesting Method | Can use flow-through systems where worms migrate to new food | Often requires manual separation of worms from compost |
| Sustainability | More sustainable for long-term, large operations | Good for operations with space limitations |
Flow-through systems offer a major advantage with bed methods. These systems allow worms to move naturally toward fresh food sources above. This movement cuts out the need to separate worms from finished compost. Our experience shows that windrow systems work best for farms or large community gardens, while container methods suit urban settings or smaller operations.
Space and infrastructure requirements
Beyond choosing between bed and container methods, proper space planning is vital for success. We need enough room for worm beds, processing areas, and storage of both raw materials and finished vermicompost.
A large-scale operation requires dedicated space with good drainage, protection from extreme weather, and easy access for equipment.
The ideal facility maintains moisture levels between 70% to 90% and keeps temperatures at 18-30°C. This often means investing in proper roofing, ventilation systems, and possibly heating or cooling equipment depending on your local climate.
Floor surfaces should be concrete or another washable material to help with cleaning and pest control. Good lighting helps staff monitor worm health and compost quality during daily operations.
Strategies for Expanding Production
We’ll show you proven ways to boost your worm farm output and grow your vermicompost business. Read on to learn our top tips for success!
Increasing worm population and breeding
Growing your worm farm starts with smart breeding plans. We want to help you boost your worm numbers for more vermicompost.
- Feed worms the right amount of food to keep them happy and breeding well.
- Keep the bedding moist but not wet, as dry spots slow down worm breeding.
- Maintain a pH level between 6.0 and 7.0 for the best worm reproduction rates.
- Watch for small, lemon-shaped cocoons which can hold up to 20 baby worms each.
- Most cocoons contain 2-3 baby worms that will hatch in about three weeks.
- Add new bedding materials monthly to give worms fresh areas to breed in.
- Split your worm bins once they get crowded to prevent stress and boost breeding.
- Pick a mix of adult worms for new bins to ensure good breeding stock.
- Protect worm beds from extreme heat or cold which can stop breeding.
- Track your worm population growth by counting cocoons in small sample areas.
- Feed protein-rich foods like coffee grounds to boost worm reproduction rates.
- Harvest vermicompost without taking cocoons to keep future generations safe.
- Use red wigglers for faster breeding as they make more cocoons than other types.
- Give worms extra space to move and mate by not overfilling your bins.
Implementing efficient feeding schedules
Now that we’ve covered how to grow your worm population, let’s talk about keeping them well-fed. Our worms need the right food at the right times to make quality vermicompost that reduces heavy metal bioavailability in soil.
- Feed small amounts often rather than large amounts rarely to prevent rotting and odours.
- Mix food scraps with shredded paper or cardboard to create air pockets and absorb excess moisture.
- Place food in different spots each time to ensure even feeding across the entire system.
- Track how quickly worms eat through their food to adjust your feeding schedule.
- Create a feeding chart to mark when and where you last fed your worms.
- Add food when most of the previous batch has been eaten, usually every 3-5 days.
- Chop or blend food scraps to speed up the breakdown process and make it easier for worms to eat.
- Keep a consistent feeding time to maintain system balance and worm health.
- Add crushed eggshells once a week to provide calcium and help worms digest food better.
- Avoid overfeeding as this leads to smells, pests, and can harm worm health.
- Use a thin layer approach – spread food in layers no more than 5 cm thick.
- Rotate feeding zones in large beds to give worms time to process food fully.
- Cover fresh food with a thin layer of bedding to deter fruit flies and other pests.
- Adjust feeding based on seasonal changes – worms eat less in cooler weather.
- Test new food types in small amounts before adding them to your main feeding plan.
Managing moisture levels and aeration
After setting up efficient feeding schedules, we must focus on proper moisture and air flow in our vermicompost systems. Good moisture and air balance helps worms thrive and speeds up the 3-5 month production cycle.
- Moisture levels should stay between 60-80% for optimal worm activity – think of a wrung-out sponge.
- We check moisture weekly by grabbing a handful of bedding and squeezing it – only a few drops should come out.
- Spray bottles work well for small systems while larger operations need sprinkler systems or soaker hoses.
- Too much water pushes out air and creates bad smells, while too little slows down worm feeding.
- Turning the compost gently once a week helps air flow through the material.
- Adding bulky items like cardboard strips, egg cartons, or straw creates air pockets in the mix.
- Raised beds with mesh bottoms allow better air flow than solid containers.
- Curing finished compost for three months helps neutralise acids that form during breakdown.
- We cover systems with breathable materials like burlap to keep moisture in while letting air flow.
- Moisture needs change with seasons – summer requires more watering, winter needs less.
Operation and Maintenance Tips
We keep our worm farms running smoothly with proper care. Good maintenance stops problems before they start.
Preventing pests and escaping worms
Proper management keeps pests away from our vermicompost systems. We focus on these key steps to maintain a healthy worm environment and stop unwanted visitors.
- Keep meat and dairy out of the bin to prevent flies and rodents from being attracted to your system.
- Cover fresh waste with dry bedding to block odours that might draw pests to your compost.
- Check moisture levels daily – too wet conditions lead to pest problems and cause worms to try to escape.
- Place your bins on bricks or blocks to stop rodents from getting in through the bottom.
- Add a light source near the top of open systems since worms avoid light and will stay in the compost.
- Fix proper aeration by poking holes in closed systems to maintain oxygen flow and reduce odours.
- Use a tight-fitting lid on your bins to stop both pests from getting in and worms from climbing out.
- Monitor humidity levels and keep them between 70-80% for best worm health and to stop escape attempts.
- Create a barrier of petroleum jelly around the top edge of bins to stop crawling insects from entering.
- Add crushed eggshells to the bin to control acidity and make the environment less appealing to flies.
- Harvest compost regularly to prevent overcrowding that might stress worms and cause them to leave.
- Place a tray under bins to catch any escaping worms so you can return them to the system.
Monitoring nutrient levels in the compost
We check our compost nutrient levels regularly to ensure high-quality vermicompost production. Proper nutrient balance supports healthy worm activity and creates better end products.
We look for dark-coloured compost with few uneaten food scraps as a sign of good nutrient conversion. The finished vermicompost should feel like a damp sponge and have reached room temperature.
Our team uses simple test kits to assess nitrogen, phosphorus, and potassium levels in the compost. These tests help us adjust our feeding mix to get the best results. Compost nutrient level management becomes more vital as we scale up production.
Nutrient level supervision helps us spot problems before they affect our worms or final product. We inspect our compost beds weekly for signs of imbalance such as strong smells or slow breakdown of materials.
Maintaining stable nutrient levels leads to richer vermicompost that plants love. The moisture content directly affects how nutrients move through the system, so we keep careful track of both.
Next, we’ll explore the best methods for harvesting the nutrient-rich vermicompost you’ve worked so hard to create.
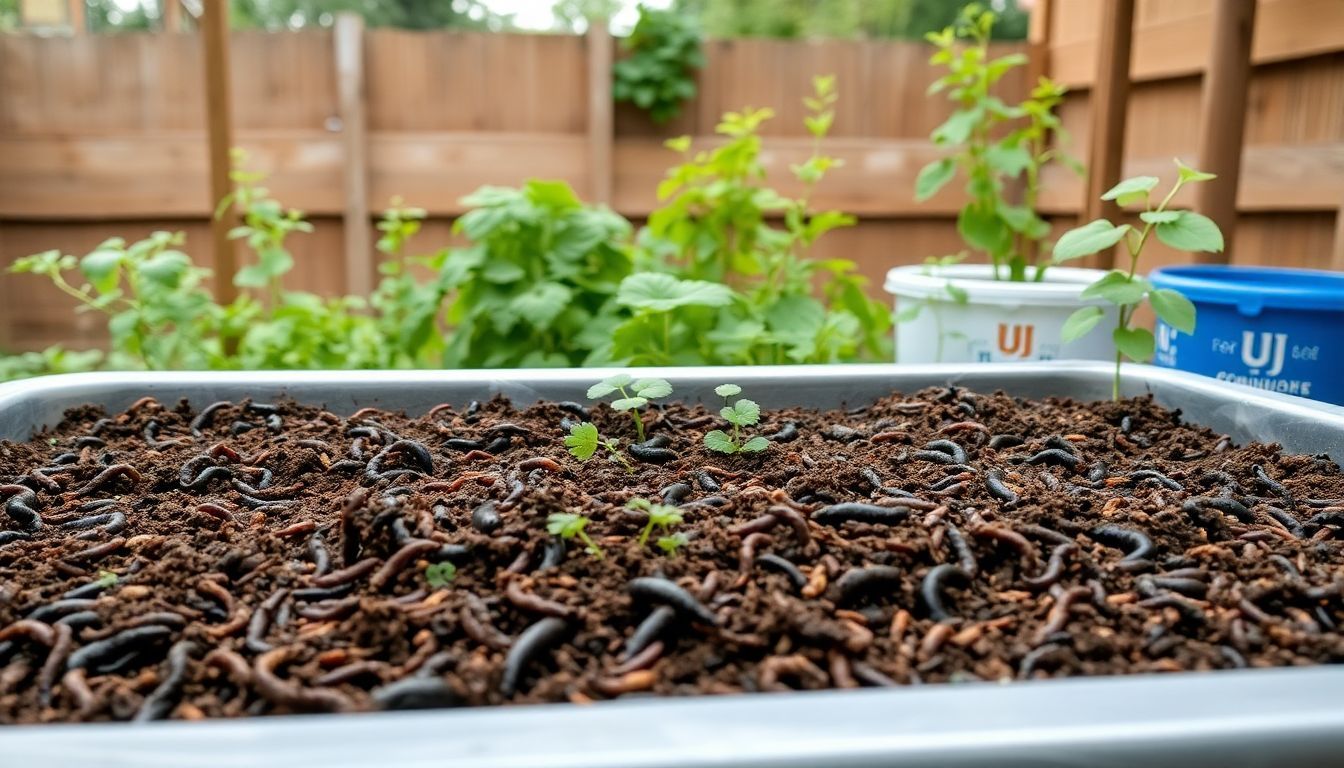
Harvesting and Utilising Vermicompost
Harvesting and using vermicompost marks the final step in your worm farming journey. We’ll show you quick ways to gather your black gold and how to apply it for amazing results in your garden beds and farm fields.
Best methods for harvesting vermicompost
We want to share the top ways to collect your worm castings. These methods help you gather the rich organic fertiliser while keeping your worms safe for future composting.
- Dump and Hand Sort – Empty your bin onto a tarp in bright light. Worms will move away from light, letting you scrape off the top layer of castings while they burrow down.
- Let the Worms Do the Sorting – Place fresh food on one side of your bin. Worms will move toward the food, leaving their castings behind for easy collection.
- Alternate Containers – Use a system where worms move up through holes into new bedding with fresh food, leaving finished compost below.
- Divide and Dump – Split your worm bin in half. Add fresh bedding to one side with food to attract worms, then harvest the other side once worms migrate.
- Pyramid Method – Make a cone-shaped pile of your compost on a tarp. The worms will move to the bottom of the pile as you remove layers of worm castings from the top.
- Screen Sifting – Push compost through a mesh screen to separate worms from soil conditioner. This works well for large amounts of garden soil enrichment.
- Migration Trays – Stack trays with holes that allow worms to climb up toward new food, leaving microorganism-rich castings in the lower trays.
- Light Harvesting – Spread compost in a thin layer under bright light. Collect worms as they move to the bottom, then gather the worm-free organic waste on top.
Applications in agriculture and gardening
We apply vermicompost in several ways to boost plant growth in farms and gardens. Our favourite method mixes it directly into soil before planting, which improves soil structure and adds vital nutrients.
Vermicompost contains higher levels of nitrogen and phosphorus than regular compost, making plants grow stronger. Many farmers dilute it with water to create liquid fertiliser, often called “worm tea,” which feeds plants through their leaves and roots.
Proper use of vermicompost helps plants resist disease and stress. The nutrient-rich mixture enhances water retention in soil, so plants need less watering during dry spells. Garden plants grown with worm castings show better root development and produce more flowers and fruits.
Unlike chemical fertilisers, our organic worm compost won’t burn plants and releases nutrients slowly over time.
Challenges in Scaling Up Vermicomposting
Scaling up vermicomposting brings real challenges that need smart solutions. Odour problems and cost-profit balance can test even the most skilled worm farmers.
Managing odours
Odour control stands as a major challenge in large-scale vermicomposting. We find that proper aeration helps reduce smells that come from organic waste breaking down. Too much moisture or poor air flow often causes bad odours in compost piles.
The Chhattisgarh Government’s “Godhan Nyay Yojana” Scheme, launched on 20 July 2020, shows how well-managed vermicompost can turn waste into value. This programme buys cow dung for vermicompost, which helps cut down on smells through quick processing.
To keep odours at bay, we mix brown materials like dry leaves with green waste. This creates the right carbon-to-nitrogen ratio for our worms to work well. Regular turning of compost beds also stops anaerobic spots that smell bad.
Our systems use covers that let air in but keep rain out, as too much water can make smells worse. Good waste management practices in vermicomposting reduce landfill use and make the process more pleasant for workers and neighbours.
Balancing production costs and profits
We must track all expenses against income to keep our vermicomposting business profitable. Equipment maintenance costs money but extends the life of our systems. Simple equipment choices help us keep startup costs low while still reducing greenhouse gas emissions.
Our waste recycling efforts create value through high-quality compost sales. The climate in our area affects how quickly we produce compost, which impacts our cash flow. Many large-scale operations find their break-even point after 12-18 months of consistent production.
Next, let’s examine the common challenges that arise when scaling up vermicomposting operations.
Conclusion
Scaling up vermicompost turns waste into gold for farms and gardens. Your worm farm can grow from small bins to large beds with the right planning and care. Good systems need proper feeding, moisture control, and regular harvesting to work well.
Worms will thank you with rich, dark compost that plants love. Start small, learn as you go, and soon you’ll produce enough black gold to feed all your growing needs.