Making good vermicompost at home can feel tricky when you’re unsure if it’s ready to use. We’ve struggled with this same issue in our gardens and found that proper vermicompost shows itself through key signs like a rich dark colour and crumbly texture.
Our guide will walk you through setting up your bin, feeding your worms, checking progress, and spotting when your compost is just right for your plants. Follow these simple steps to turn those kitchen scraps into black gold for your garden – your plants will thank you for it!
Setting Up the Vermicomposting System

Setting up a vermicomposting system needs proper planning and the right materials. We’ll guide you through choosing worms, setting up bins, and adding the best bedding to start your worm farm.
Choosing the right worm species
We need to pick the best worms for our compost bin. Red wigglers (_Eisenia fetida_ and _Eisenia andrei_) make a top choice as they move toward fresh food, which helps us collect castings later.
Other good options include European nightcrawlers (_Eisenia hortensis_), African nightcrawlers (_Eudrilus eugeniae_), Blueworms (_Perionyx excavatus_), and Lampito mauritii.
Not all worms work well for vermicomposting. Avoid _Lumbricus rubellus_ and _Lumbricus terrestris_ because they dig too deep. The worms must stay happy in your bin’s temperature range.
Most composting worms thrive between 15–25°C. They can live at 10°C but will struggle if temps rise above 30°C. Your worm species selection directly affects how well your vermicomposting system performs.
The right worm species turns kitchen scraps into black gold for your garden.
Preparing the compost bin
After selecting the right worm species, we must set up a proper home for them. Our compost bin needs to be ready before adding any worms. The Urban Worm Bag system works great for beginners because it lets us collect finished compost from the bottom.
This design makes harvest time much easier. We prefer to use bins with good air flow and drainage holes to keep our worms happy.
For larger projects, raised bed systems offer an excellent option. These systems use physical barriers to stop worms from escaping. Windrow systems work well for bigger garden spaces too.
Both methods help us manage larger amounts of waste. The right bin setup forms the base of a good vermicomposting system. Our bin choice depends on the space we have and how much food waste we plan to process.
Adding bedding material
We need to create a cosy home for our worms with the right bedding. Good bedding helps keep moisture at 70-80% and gives worms places to hide. We use shredded newspaper, untreated leaves, and non-chemical paper towels as base materials.
These items break down slowly and help air flow through the bin. The bedding should feel like a damp sponge – wet but not dripping. Our worms will eat both the food scraps and bedding over time.
Fresh bedding must be added every few weeks to keep the right moisture balance. Now let’s move on to what foods work best for your hungry worm team.
Feeding the Worms
We feed our worms with kitchen scraps like fruit peels, coffee grounds, and vegetable waste. These little recyclers turn organic waste into rich plant food through their special digestive process.
Selecting suitable feedstock
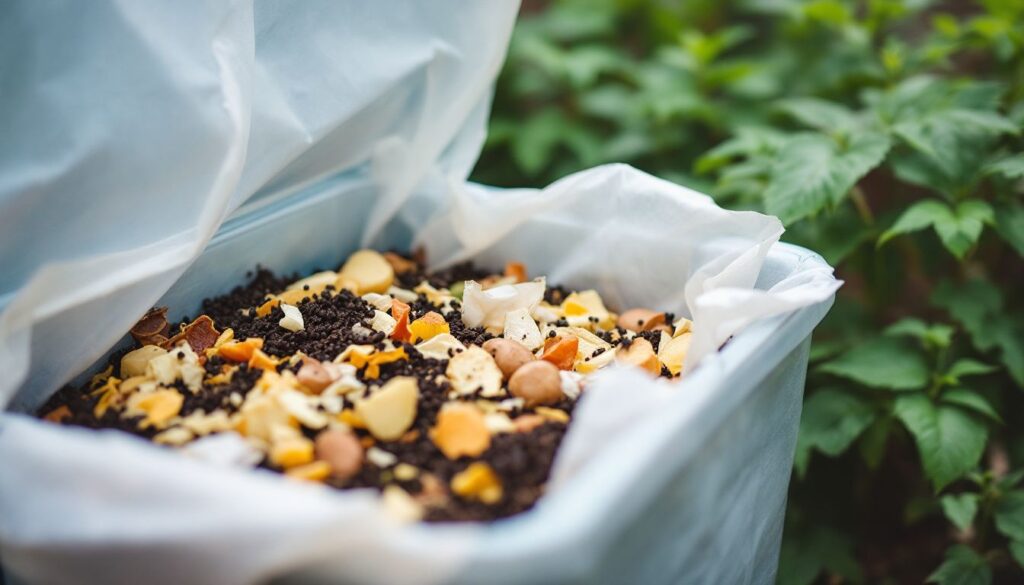
Feeding our worms the right materials helps create rich vermicompost. For small-scale composting, we use fruit and vegetable scraps, coffee grounds, tea bags, and rinsed eggshells.
Untreated leaves, grass clippings, and newspapers work well too. Large-scale operations need dairy cow or pig manure, brewery waste, or food processing leftovers. Cotton mill waste and wood chips mix nicely with cafeteria waste and grass clippings.
Good feedstock selection is the foundation of successful vermicomposting – what goes in determines what comes out.
Organic waste breaks down faster when cut into small pieces. Kitchen scraps should be free from oils, meats, and dairy products as these can cause bad smells. Green waste adds nitrogen while paper products add carbon to create balanced compost.
Our worms thrive on this mix of biodegradable materials, turning food waste into garden gold through their digestive process.
Maintaining proper moisture and temperature levels
After choosing the right food for your worms, we must create the perfect home for them. Worms need a moist home to thrive. We aim for 70-80% moisture in the bin – it should feel like a damp sponge.
Too dry, and the worms can’t breathe through their skin. Too wet, and they might drown. We check moisture by squeezing a handful of bedding – a few drops should come out, not a stream.
Temperature plays a huge role in worm health. Our wriggly friends work best between 15-25°C (59-77°F). They can survive at 10°C (50°F) but will slow down. Heat above 30°C (86°F) can kill them.
During summer, we place the bin in shade or cool spots. In winter, we move it to warmer areas or add insulation. The ideal worm habitat needs both proper humidity control and temperature regulation to keep our composting helpers happy and productive.
Monitoring the Vermicompost Process
We need to check our worm bins often to spot any issues early. Regular checks help us keep our worms happy and make sure the compost forms well.
Checking for pests and smells
We check our vermicompost bin weekly for pests and odd smells. A healthy bin should smell earthy, like fresh soil. Foul odours often signal too much food or water. Our reader Ryan P.
found his compost wet and sticky, with water drops when squeezed. This happens a lot in plastic bins where air can’t flow well.
A healthy vermicompost system should smell like a forest floor after rain – earthy and pleasant.
To spot pests, we look for tiny white mites, fruit flies, or ants. Small numbers of these bugs won’t harm the system. If we see too many, we might need to dry the bin a bit or add less food.
The right balance keeps both worms and humans happy with the smell and pest levels.
Observing worm health and reproduction
After checking for pests and odd smells, we must pay close attention to our worms’ health and breeding habits. Healthy worms should look plump and move quickly through the bedding.
Small worms often signal poor growth conditions in the bin. This problem needs quick fixing with fresh bedding and food to help them thrive again.
The number of cocoons (worm eggs) tells us a lot about our compost. Fewer cocoons mean the worms aren’t breeding as much, which points to two things: the living space might need changes or the compost is getting mature.
Slowed worm activity and fewer baby worms often show that your vermicompost is nearly ready for harvest. Our worms give us clear signs about the quality of our compost if we learn to spot them.
Recognising When Vermicompost is Ready
Recognising when your vermicompost is ready marks a key step in the process. You’ll spot the signs through colour changes, texture shifts, and worm behaviour patterns.
Deep, dark brown colour
We look for a rich brown colour to tell if our vermicompost is ready. This deep brown shade shows that organic matter has broken down properly. The colour should be like coffee grounds – not too light and not too black.
If the compost turns overly black, it might mean there’s not enough air getting in.
The true mark of perfect vermicompost lies in its rich, earthy brown colour – nature’s signal of readiness.
Our finished vermicompost should match the colour of dark chocolate. This specific shade tells us the nutrients are now available for plants to use. The dark brown mature vermicompost contains fully decomposed organic matter that will serve as an excellent soil amendment.
We test our compost by taking a small handful and checking its colour against good light.
Uniform, crumbly texture
We check for a uniform, crumbly texture as a key sign of mature vermicompost. Fully ready compost breaks apart easily in our hands and has the same feel throughout all parts. This consistent texture shows that worms have processed all materials properly.
Our vermicompost needs to cure for up to 3 months to achieve the right particle size and neutralise acids completely. The final product should feel like coffee grounds – not too wet or sticky.
This perfect texture makes the nutrients more available to plants when we add it to our garden soil. Next, we’ll explore how slowed worm activity signals that harvesting time has arrived.
Slowed worm activity and reproduction
Beyond the crumbly texture, worm behaviour tells us a lot about compost readiness. Our worms show clear signs when the compost matures. A drop in cocoon numbers signals that reproduction has slowed down, which points to mature compost.
This happens because the food sources have been mostly used up.
We notice smaller worms in mature vermicompost, showing they face tougher growth conditions. This size change occurs as their food supply decreases. The worm population stops growing rapidly at this stage.
These signs help us know it’s time to harvest our vermicompost and give our worms fresh bedding and new food sources.
Harvesting the Vermicompost
Harvesting your vermicompost at the right time gives you the best results for your garden. We’ll show you how to gather this black gold without harming your worms in our complete guide.
Using the migration method
We harvest our vermicompost using the migration method, which works with worms’ natural habits. The pyramid method involves placing finished compost under sunlight, forming a cone shape.
This light exposure makes worms burrow downward, away from the surface. We can then collect the top layers that contain mostly worm-free compost. Another approach is continuous feeding on one side of the bin.
We add fresh food to one area, which draws worms there. After a few days, we scoop out the finished compost from the opposite side where fewer worms remain. Both methods save time and protect our worm population for future composting cycles.
Separating worms from finished compost
We separate red worms from finished compost using their natural habits. These helpful creatures move toward fresh food sources on their own, making our job easier. To start the process, we push the compost to one side of the bin and add new bedding with food to the empty space.
The worms will crawl to the new food within a few days.
For larger systems like windrow or raised beds, we employ similar methods. Our team places fresh materials at one end, allowing the worms to migrate naturally. This gentle approach keeps our worm population healthy while giving us clean castings.
A simple screen or sieve helps catch any stragglers that didn’t make the journey to their new home.
Preparing Vermicompost for Application
We screen our vermicompost through a fine mesh to remove any large bits and store it in a cool, dry place until needed. Learn more about getting your worm compost ready for your plants!
Screening to remove large particles
Screening finished vermicompost helps us create a finer product for our plants. We use simple mesh screens to sift out any large bits that haven’t fully broken down. This process removes items like fruit pits, eggshell pieces, and wood chips that need more time to decompose.
Our goal is to make the compost smooth and easy to mix with soil. Most gardeners prefer a screen size between 1/4 to 1/2 inch mesh for best results.
The screening step also lets us spot and remove any materials that shouldn’t go into our gardens. Newspapers, non-chemical paper towels, and other paper products may still show up as larger pieces.
Fresh compost often contains these bits from our bedding materials. For large-scale operations that use dairy cow manure or food processing waste, screening becomes even more vital to ensure a clean, uniform product that plants can use right away.
Storing in a cool, dry place
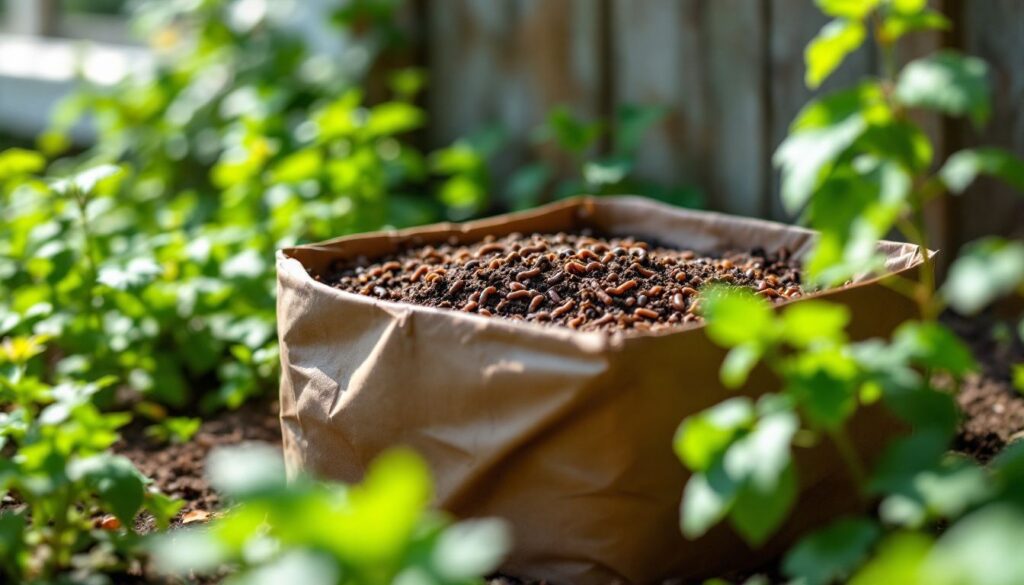
After screening our vermicompost to remove larger bits, we need to store it properly. A cool, dry place works best for keeping vermicompost fresh and potent. We store ours in breathable containers like burlap sacks or paper bags that allow air flow but keep moisture out.
The ideal storage temperature matches what worms prefer – between 15-25°C. This range helps maintain the helpful microbes without letting them become too active.
Our vermicompost needs time to cure properly. We let it sit for up to 3 months in storage. This curing period allows the particle size to become more even and helps neutralise acids.
Direct sunlight can harm the beneficial microbes, so we keep our stored vermicompost in a shaded spot. Proper storage ensures our nutrient-rich humus stays ready for our organic gardening needs whenever we need to boost soil health.
Benefits and Uses of Ready Vermicompost
Ready vermicompost boosts soil health, feeds plants naturally, and helps gardens thrive without chemicals. Read on to learn how to make this black gold for your garden!
Enhancing soil fertility
Vermicompost works wonders for soil fertility. We add it to our gardens to boost aeration and improve how soil holds water. Our plants love this dark, crumbly material because it makes the soil come alive with helpful microbes.
Tests show vermicompost contains higher levels of nitrogen and phosphorus than regular compost. These nutrients feed plants directly and help them grow strong.
The magic happens as worms break down waste into a form plants can use easily. Soil treated with vermicompost shows less heavy metal content that might harm plants. Many farmers notice their crops grow better with less chemical fertiliser needed.
The improved water retention means less watering and healthier root systems. This natural soil conditioner creates the perfect environment for sustainable growing practices.
Promoting healthy plant growth
We love how vermicompost boosts plant growth in amazing ways. It contains plant hormones that help seeds sprout better and make roots grow stronger. These special worm castings make crops yield more too! Plants thrive with the rich mix of nutrients found in this dark, crumbly matter.
Our gardens show clear signs of health when we add this natural food to the soil.
The magic of vermicompost lies in its water-soluble nutrients. We can extract these as vermiwash to use as an organic fertiliser. This liquid gold works as both plant food and soil helper.
Many organic gardeners see faster growth and greener leaves after using it. The eco-friendly nature of this process makes it perfect for sustainable farming methods. Next, let’s look at how to wrap up the vermicomposting process with a proper conclusion.
Conclusion
Making vermicompost at home helps our gardens grow while cutting waste. Your worms will turn kitchen scraps into black gold when you follow these simple steps. The finished product should look dark and crumbly, feel moist like a wrung-out sponge, and smell like fresh earth.
Harvest your compost when worms stop moving through it much, then use it right away or store it for later. This natural plant food boosts soil health and gives you a way to recycle that benefits both your plants and our planet.