Feeling fed up with binning kitchen scraps while your garden soil needs a boost? We’ve been in the same boat with our gardens until we stumbled upon a simple fix – vermicompost. Our guide shows how worms can turn food waste into rich soil in just eight weeks.
This natural process helps plants thrive while cutting down rubbish sent to landfills. Fancy starting your own worm bin?
What is Vermicomposting?
Vermicomposting uses worms to turn food scraps into rich soil. We’ll show you how this natural process works and why it’s better than regular compost heaps.
Definition and Overview
Vermicompost is organic waste broken down by microbes and worms to create rich humus. We call this process vermicomposting – a natural way to turn kitchen scraps into garden gold. The magic happens as worms eat through waste and create castings full of nutrients.
Our guide aims to be a top online resource for people new to this method. Most people don’t know that only 7 out of 7,000-9,000 earthworm species work well for this process. These special worms turn what would go to landfill into dark, crumbly soil that plants love.
The earthworm, though it lacks a backbone, is the backbone of fertile soil creation. – Steve Churchill, July 2021
How Vermicomposting Differs from Traditional Composting
Vermicomposting stands apart from traditional composting in several key ways. We use earthworms and mesophilic microbes to break down organic waste, while traditional methods rely mainly on heat-loving microbes.
Our worm bins never reach the high temperatures seen in regular compost piles, which can hit 65°C during hot phases. This cooler process protects helpful microbes and speeds up decomposition dramatically.
Most gardeners can harvest usable worm castings in just 8 weeks, compared to the 6+ months needed for traditional compost to mature.
The feeding requirements also differ between these two methods. Vermicomposting needs a higher carbon-to-nitrogen ratio of at least 50:1, unlike traditional composting’s 25-30:1 balance.
This means we add more browns (carbon materials) to our worm bins than a standard compost heap would need. Red worms work through organic waste recycling much faster, creating nutrient-rich castings that improve soil structure and plant health.
These differences make vermicomposting an excellent choice for sustainable waste management in smaller spaces.
The Role of Vermicomposting in Sustainable Gardening
Vermicomposting plays a key role in creating a greener garden. We use worm power to turn kitchen scraps into rich soil that helps plants grow strong.
Environmental Benefits
Vermicomposting offers huge benefits for our planet. We cut down landfill waste by turning food scraps into rich soil instead of letting them create methane gas. The EPA reports that in 2013, Americans made 254 million tons of trash.
Food waste and yard bits make up 30% of what sits in landfills. Our worm bins help shrink this number fast. The carbon footprint of home composting is much smaller than sending waste to be processed elsewhere.
Each bin we set up keeps organic matter out of dumps and turns it into garden gold. This simple act helps fight climate change while giving us free plant food.
Contribution to Soil Health
Vermicompost works wonders for soil health in many key ways. We’ve seen how it boosts soil structure by improving water retention and nutrient exchange. The process adds carbon to topsoil, which supports plant photosynthesis and growth.
Our research shows that worm castings create rich, fertile growing conditions that plants love.
The soil speaks through its earthworms – where they thrive, plants will flourish.
Over 34,000 studies prove the amazing effects of vermicompost on both soil and plants. The worms themselves play a vital role by digging tunnels that aerate the soil. These tiny workers transform organic matter into nutrient-rich castings that feed soil microbes.
This natural system creates a living soil web that crops need for top productivity.
Reduction of Organic Waste
Vermicomposting plays a vital role in cutting down organic waste that goes to landfills. We can help ease the pressure on landfills through this simple process. The facts show that each person in the US creates about 4.4 pounds of trash daily, based on EPA data from 2013.
Food scraps and yard waste make up 30% of what fills our landfills. These items could be turned into rich soil instead of taking up space in dumps.
Our worm bins can turn kitchen scraps into garden gold while saving money on waste collection fees. This natural process keeps organic matter out of the waste stream and puts it back into the soil where it belongs.
Many councils now charge for rubbish removal by weight, so less waste means lower bills. The garden benefits from free, natural fertiliser while the planet gets a break from excess waste.
Benefits of Vermicomposting
Vermicompost offers amazing benefits for your garden and the planet. We’ll show you how this simple process can boost plant growth, improve soil health, and turn kitchen scraps into garden gold.
Improved Plant Growth and Yield
We’ve seen amazing results from using vermicompost in our gardens. Plants grow faster, seeds sprout sooner, and fruits develop earlier when we add this natural wonder to our soil. Our tests show that mixing just 10% vermicompost with regular potting soil creates the perfect growing environment.
The rich nutrients in worm castings help plants produce larger fruits and stronger stems. Many gardeners report that their crops not only grow better but also face fewer problems with pests and diseases.
This eco-friendly fertiliser boosts soil biodiversity, which naturally fights harmful bugs and germs. The living organisms in vermicompost also help plants get more from the soil, making them healthier without chemical fertilisers.
Enhanced Soil Microbial Activity
Vermicompost boosts soil life in amazing ways. Our research shows that over 34,000 studies prove how good vermicompost is for soil and plants. The tiny microbes in vermicompost break down organic matter faster than normal compost.
These helpful bugs create a rich web of life in your garden soil.
The worms and microbes work as a team to improve your soil health. They help cycle nutrients that plants need to grow strong. This process adds carbon to your topsoil, which helps plants make food through photosynthesis.
The mix of mesophilic microbes and earthworms creates the perfect recipe for soil that stays healthy year after year.
Natural Fertiliser Production
Beyond soil microbes, vermicomposting creates top-quality natural fertiliser. We produce humus through this process, which plants love for healthy growth. This rich fertiliser contains balanced nutrients that garden plants need to thrive.
Worm castings work better than many store-bought options.
Our worm bins make usable compost in just 8 weeks, much faster than regular compost piles. The speed means we can feed our gardens more often with fresh nutrients. The fertiliser production also offers money-making chances.
Worms sell for $30-$35 per pound in today’s market. The castings themselves fetch up to $600 per cubic yard when sold to gardeners and farmers. This makes vermicomposting both eco-friendly and possibly profitable.
Vermicompost is nature’s perfect plant food – created by worms in weeks, not months, and worth its weight in garden gold.
Understanding Earthworms
Earthworms are the tiny heroes of vermicomposting, turning kitchen scraps into garden gold through their amazing digestive systems. We’ll show you which worms work best for your bin and explain how these helpful creatures create rich compost for your plants.
Types of Worms Used in Vermicomposting
Worms play a vital role in the vermiculture process as natural decomposers. We need to pick the right types of worms for successful vermicomposting, as not all earthworms work well in compost bins.
- Red Wigglers (Eisenia fetida) – These are the most common worms for home vermicomposting in the Northern Hemisphere. They eat half their body weight daily and thrive in organic waste.
- European Nightcrawlers (Eisenia hortensis) – These larger worms work well for fishing bait and garden soil. They can handle cooler temps than other compost worms.
- Indian Blue Worms (Perionyx excavatus) – These worms breed fast and work best in warmer areas. They turn waste into castings more quickly than Red Wigglers.
- African Nightcrawlers (Eudrilus eugeniae) – These big worms need warm temps and do well in large-scale systems. They eat lots of waste and make rich castings.
- Garden Worms – Common garden worms don’t suit worm bins as they need deep soil to burrow. They can’t live in the shallow depth of most worm bins.
- Manure Worms – These small red worms look like Red Wigglers and work great for breaking down animal manure. They help with nutrient cycling in compost.
- Brandling Worms – These striped worms live in compost heaps and manure piles. They work fast to break down waste into soil nutrients.
- Red Tiger Worms – These worms have a tiger-like pattern and excel at making worm tea. They boost soil health through their rich castings.
Earthworm Biology and Their Role in Composting
We group earthworms into three main types based on where they live and dig: epigeic, endogeic, and anecic worms. Each type plays a special part in breaking down waste. Red Wigglers belong to the epigeic group and work best for home compost bins.
These small worms pack a punch with 800-1,000 worms per pound and can handle changes in heat quite well. They cost less than other worms, making them a top choice for most people starting out.
European Nightcrawlers offer another option for compost bins, though they differ from Red Wigglers in key ways. These larger worms come in smaller numbers (300-400 per pound) and prefer cooler spots.
They don’t breed as fast as Red Wigglers but still turn food scraps into rich soil. Both types eat through organic waste and make plant food as they digest. Their poop (called castings) adds good bugs to soil and helps plants grow strong.
How to Start Vermicomposting
We’ll show you how to start your own worm bin at home with simple steps that make vermicomposting easy and fun for the whole family. Ready to turn your kitchen scraps into black gold for your garden?
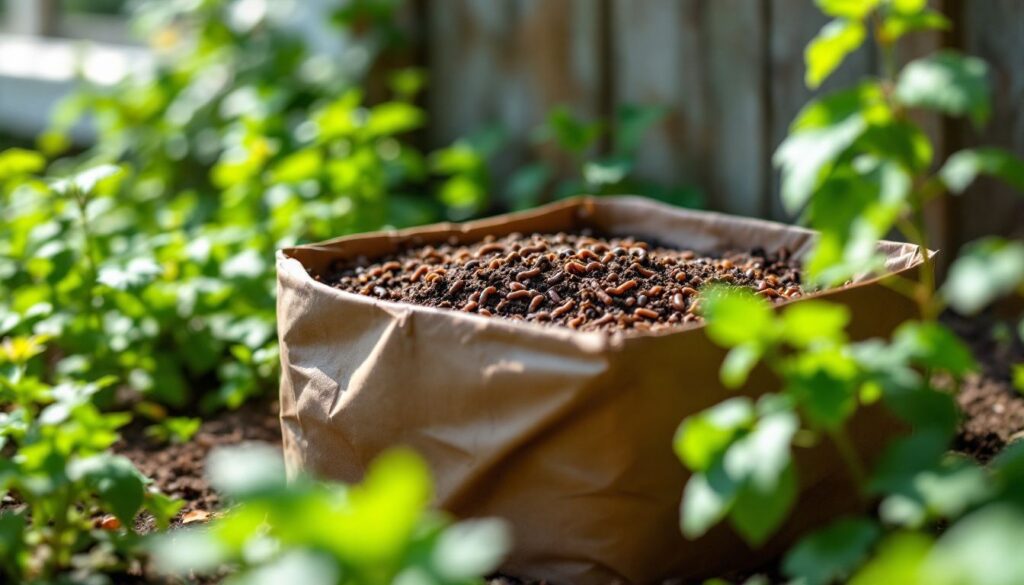
Choosing the Right Worm Bin
Picking the perfect worm bin is key to successful vermicomposting. We want to help you find the right home for your wriggly workers that fits your space and needs.
- Plastic storage bins work great for beginners. These cost-friendly options need drainage holes at the bottom and air holes on the sides and lid.
- Wooden bins offer good insulation for worms in changing temperatures. The natural material allows better air flow but may rot over time if not treated properly.
- Stacked tray systems let worms move upward as they finish composting lower levels. This design makes harvesting worm castings much easier without disturbing the worms.
- The Urban Worm Bag uses a fabric bag with top feeding and bottom harvesting. This system needs about 4-6 months before your first harvest is ready.
- Ventilation holes are must-have features in any worm bin. Your worms need fresh air to break down kitchen scraps properly.
- Drainage holes prevent too much water from building up in your worm farm. Excess moisture can drown worms or create bad smells.
- Size matters for your composting bins. Allow at least one square foot of surface area for each pound of food waste per week.
- Indoor bins should be odour-free and fit under sinks or in closets. Smaller bins work well for flats or homes with limited space.
- Outdoor bins can be larger but need protection from extreme heat, cold, and rain. Place them in shady spots to keep temperatures stable.
- DIY options cost very little – just modify buckets or storage containers with proper holes. This makes worm composting a budget-friendly way to start sustainable waste management.
Now that you’ve chosen the perfect bin for your worm farm, let’s look at what type of bedding will keep your earthworms happy and healthy.
Selecting Appropriate Worm Bedding
Choosing the right bedding for your worm bin is key to successful vermicomposting. We want to share the best options that will keep your worms happy and your compost healthy.
- Coco coir makes an excellent worm bedding because it holds moisture well and has a neutral pH that worms love.
- Peat moss works great as bedding, though we suggest looking for sustainable sources since it’s a limited resource.
- Aged horse manure serves as both food and bedding for worms, but must be well-aged to avoid burning the worms with fresh ammonia.
- Shredded paper creates air pockets in your bin and helps maintain the ideal carbon-to-nitrogen ratio of at least 50:1.
- Straw adds bulk to your worm bin and breaks down slowly, which helps air flow through the system.
- Torn cardboard strips work as perfect bedding material since they’re high in carbon and free from most homes.
- Finished compost can jump-start your worm bin with helpful microbes already in place.
- Dead leaves make cost-free bedding that you can gather from your yard in autumn.
- Pitt Moss offers a sustainable peat moss alternative that worms adapt to quickly.
- Mixing different bedding materials often works better than using just one type.
- Proper moisture level in bedding should feel like a wrung-out sponge – damp but not soggy.
- The carbon-rich bedding balances the nitrogen in food scraps, creating the ideal 50:1 ratio for worm composting.
Picking the Best Worms for Composting
Selecting the right worms is key to successful vermicomposting. We want to help you choose the best worms for your composting needs.
- Red Wigglers (Eisenia fetida) are the most popular choice for worm bins in homes and gardens.
- These small red worms come in large numbers with 800-1,000 worms per pound.
- Red Wigglers can handle changes in temperature better than other worm types.
- They cost less than other composting worms, making them perfect for beginners.
- European Nightcrawlers (Eisenia hortensis) are larger worms that work well in outdoor bins.
- You get fewer European Nightcrawlers per pound, about 300-400 worms.
- These worms like cooler spots and don’t breed as fast as Red Wigglers.
- Both worm types eat food scraps and turn waste into rich soil for plants.
- Garden worms from your yard won’t work well in worm bins as they need deep soil.
- Buy worms from trusted sellers who focus on worm farming for best results.
- Start with at least one pound of worms to get your bin working quickly.
- Healthy worms move fast and have a pinkish-red color when you buy them.
Feeding Your Worms
We feed our worms the right food to keep them happy and healthy. Our worms turn kitchen scraps into rich compost that helps plants grow strong.
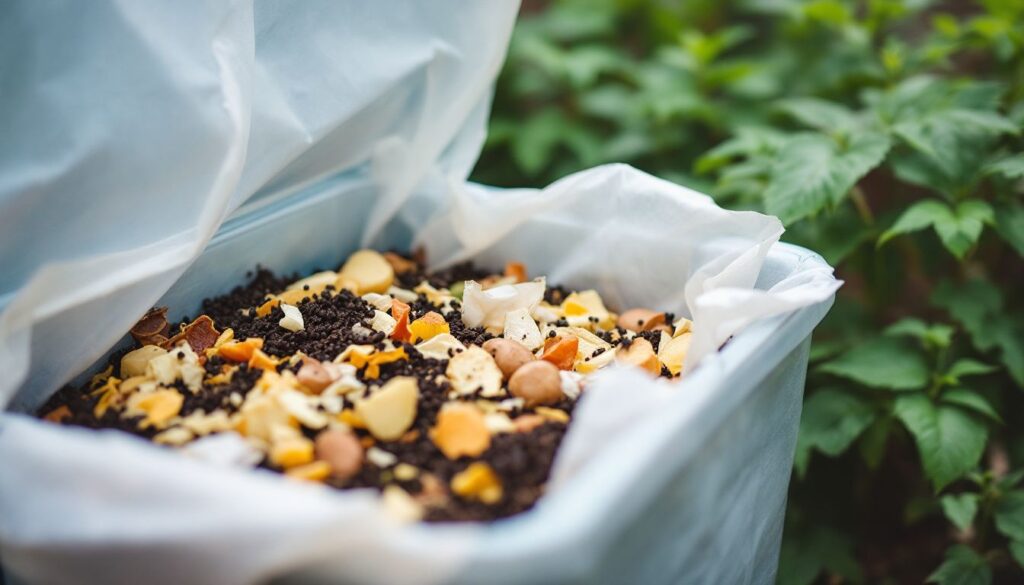
Suitable Food Waste for Worms
Worms play a key role in vermicomposting by turning kitchen waste into rich soil. Our worm friends have clear food likes and dislikes that help them make the best compost for your garden.
- Fruit scraps make great worm food, including apple cores, banana peels, and melon rinds that break down fast in the bin.
- Most veggie scraps work well in worm bins, such as carrot tops, potato peels, and lettuce leaves that worms eat quickly.
- Coffee grounds add nitrogen to your worm bin and help balance the carbon from other food scraps.
- Tea bags can go in the bin if you remove any staples or plastic parts first.
- Crushed eggshells give worms calcium and help keep the bin from getting too acidic.
- Bread and plain pasta must be added in small amounts as they can get soggy and cause bad smells.
- Paper products like napkins, paper towels, and cardboard egg cartons make good bedding and food when torn into small bits.
- Citrus peels should be used sparingly as too much acid can harm worms.
- Onion scraps should be limited since strong smells might drive worms away from that area of the bin.
- Meat, fish, and dairy items must stay out of the worm bin as they rot, smell bad, and attract pests.
- Oily foods can coat worms and block their breathing pores, so keep these out of your bin.
- Pet waste is not safe for worm bins that will be used on food gardens due to harmful germs.
- Overfeeding leads to leachate (liquid at the bottom), fruit flies, and bad smells in your worm bin.
How Much and How Often to Feed
Feeding your worms correctly keeps them happy and productive in your vermicompost bin. We need to balance giving them enough food without overwhelming the system.
- Start slowly with new bins by feeding no more than 25% of the worms’ weight during the first week.
- Most compost worms eat between 25-33% of their body weight each day when settled in.
- A pound of worms can process about 3.5 pounds of food waste per week in ideal conditions.
- Small feedings twice weekly work better than one large feeding for most home worm bins.
- Watch how quickly food disappears to adjust your feeding schedule – faster consumption means hungrier worms.
- Chop food into smaller pieces to speed up the feeding process and help worms eat more efficiently.
- Feed in a different spot each time to avoid disturbing areas where worms are actively working.
- Check moisture levels before adding wet food scraps – too much moisture can drown your worms.
- Cut back on feeding if you notice bad smells or pests, as this shows the worms can’t keep up.
- Increase food amounts gradually as your worm population grows over time.
Next, we’ll explore the best ways to maintain your worm bin to create perfect living conditions for your hardworking decomposers.
Tips for Chopping or Pre-treating Food Waste
Food waste needs proper prep before it goes to your worm bin. We find that taking a few extra steps with kitchen scraps helps worms break down organic waste faster.
- Cut food scraps into small pieces (about 2.5 cm chunks) to speed up the breakdown process.
- Freeze banana peels and other fruit waste to break down cell walls, making them softer for worms.
- Blend tough vegetable scraps with water to create a slurry that worms can eat more easily.
- Soak dry items like bread or cardboard in water before adding to your compost pile.
- Crush eggshells into tiny bits to add calcium to your worm bin.
- Microwave food waste for 30 seconds to kill fruit fly eggs that might be present.
- Mix coffee grounds with dry bedding materials to balance moisture in the worm bin.
- Boil potato peels to remove growth inhibitors that can harm your garden plants.
- Mash soft fruits like strawberries and peaches to make them more accessible to microorganisms.
- Use the PFRP method for large batches – heat compost to 55°C for three days to kill pathogens.
- Try Aerated Static Pile composting to prepare waste in just 3 weeks instead of 6-9 weeks.
- Precompost large amounts of kitchen waste to reduce volume before adding to your main bin.
- Bury chopped food waste under 5 cm of bedding to stop odours and keep pests away.
- Let citrus peels dry out for a few days to reduce acidity before adding to your worm bin.
- Tear paper and cardboard into strips to create air pockets in your biodegradable materials.
Maintaining Your Worm Bin
We need to keep our worm bin in top shape to grow happy worms. Good care means checking moisture, heat, and fixing any smells or bugs that show up.
Managing Moisture Levels
Proper moisture control is vital for a healthy worm bin in vermiculture. We aim to keep our worm composting systems at the right humidity levels for our wriggly helpers to thrive.
- Keep moisture at 68-75% in your worm bin, similar to a wrung-out sponge. The bedding should feel damp but not soggy when you touch it.
- Test moisture by squeezing a handful of bedding – only a few drops should come out. Too dry and worms can’t breathe through their skin; too wet and they may drown.
- Add dry bedding materials like shredded paper or cardboard if your bin gets too wet. These items help soak up extra water while keeping good aerobic conditions.
- Drill small holes in the bottom of your bin for a basic drainage system. This lets extra water flow out and stops harmful leachate from building up.
- Place a tray under your worm farm to catch excess moisture. Check this tray often as part of your worm farm upkeep.
- Watch out for leachate, which harms worms and plants. This liquid forms in bins that are too wet and lacks the good microbes found in proper worm tea.
- Mix your bin contents gently each week to check moisture throughout. This helps spot wet spots before they cause problems.
- Cover food scraps with dry bedding to balance the water from organic waste management. Fresh scraps contain lots of moisture.
- Keep your bin in a spot safe from rain and direct sun to maintain steady humidity levels. Both can quickly throw off your bin’s moisture balance.
- Use a spray bottle to add water if the bin gets too dry. Mist the surface lightly rather than pouring water, which can flood certain areas.
Controlling Temperature
Worms need the right temperature to stay happy and make good compost. We must keep our worm bins at the best heat levels for our wiggly friends to work their magic.
- Red Wiggler worms thrive in temperatures between 21-27°C (21-27°C), which is their ideal range for eating and breeding.
- Worm bin temperature should never drop below 13°C (13°C) as this slows down worm activity and can stop them from making compost.
- Heat above 35°C (35°C) can kill your worms, so keep bins away from direct sun in summer months.
- Move your worm farm to a cooler spot like a basement or garage during hot weather to protect your worms.
- Add fresh bedding materials to help control bin temperature and give worms a cool place to escape heat.
- Check your worm bin with a soil thermometer to track temperature changes through different seasons.
- Insulate outdoor bins with blankets or straw in winter to keep the temperature from dropping too low.
- Smaller worm bins heat up and cool down faster than larger ones, so size matters for temperature control.
- Feed worms less during very hot or cold times since they eat less when not in their comfort zone.
- Moist bedding helps keep the bin cool, but avoid making it too wet which can cause other problems.
Addressing Odours or Pests in the Bin
After keeping your worm bin at the right temperature, you’ll need to tackle odours and pests that might show up. We can help you keep your worm bin fresh and pest-free with these simple tips.
- Bury food scraps under bedding to stop smells and fruit flies. Fresh food left on top draws pests and causes bad odours.
- Don’t overfeed your worms as this leads to rotting food, leachate build-up, and foul smells. Feed small amounts that worms can eat in 2-3 days.
- Add dry bedding like shredded paper if your bin gets too wet. Excess moisture creates leachate and smelly conditions.
- Turn or fluff the contents weekly to add air and stop bad smells from forming in packed-down areas.
- Place a fruit fly trap near your bin using apple cider vinegar and dish soap in a small cup.
- Cover new food with a damp newspaper sheet to block fruit flies from reaching fresh scraps.
- Clean the bin edges and lid where food bits might stick and attract ants or other pests.
- Raise your bin on blocks sitting in water trays to create moats that stop ants from climbing in.
- Dry bins often attract ants, so mist the top layer if you notice these pests moving in.
- Drain leachate from the bottom tray if your bin has one. This “worm tea” can be used on plants but should not build up in the bin.
Harvesting Vermicompost
Harvesting your vermicompost is a simple process that yields rich, dark soil for your garden. We’ll show you how to collect worm castings and separate the worms from your finished compost in our next section.
Read on to learn the best methods for using this black gold in your plants!
When and How to Collect Worm Castings
Worm castings are the gold of organic gardening. We can help you learn the best ways to gather this rich soil amendment from your worm bins.
- Wait for the right time – most worm bins need 8 weeks before they make usable compost.
- Check that your castings look dark and crumbly like coffee grounds.
- Stop feeding your worms about a week before you plan to harvest.
- Move the top layer of bedding to one side of the bin to make space.
- Scoop out the dark, rich castings from the bottom of your bin with a small trowel.
- Spread the castings on a flat surface in bright light – worms will move away from light.
- Pick out any worms you see and return them to the bin.
- Use a mesh screen to sift through the compost and catch any missed worms.
- Store your harvested worm compost in a cool, dry place in a breathable container.
- Urban Worm Bag users should allow 4-6 months before their first harvest.
- Tap the sides of your worm bin to make worms move down before you start.
- Collect only what you need and leave some castings to help your worm colony thrive.
- Aim to harvest about one-third of your bin’s contents each time.
- Apply fresh worm castings to your garden soon after harvest for best results.
- Use gloves during the harvest process to keep your hands clean.
Separating Worms from Compost
We need to collect our worm castings without losing our helpful red worms. The process of separating worms from compost can be simple with the right methods.
- The light method works by placing compost on a tarp in bright sun. Worms hate light and will move down, letting us scrape off the top layer of castings.
- A mesh screen helps sift compost from worms. Push the mix through the screen and worms stay on top while castings fall through.
- Migration is a natural way to move worms. Place fresh food on one side of the bin, and worms will crawl toward it, leaving their castings behind.
- The trommel method uses a rotating mesh cylinder that costs about £30-£40 to build. This tool works well for larger amounts of vermicompost.
- Hand sorting works for small batches. Dump compost on a flat surface and pick out worms one by one.
- Pile division splits your compost into small mounds. Worms move to the middle of each pile, making the outer castings easy to collect.
- Vertical harvesting takes advantage of worms that move upward. Add fresh bedding on top of your bin, and worms will climb up to it.
- Temperature control can guide worm movement. The bottom of the pile stays warmer, so worms will go there if the top cools down.
- Moisture levels affect where worms gather. Dry the top layer slightly and worms will seek damper areas below.
- Timing matters for best results. Early morning works best for the light method since worms are more active then.
Using Vermicompost in Gardening
Vermicompost works wonders in gardens as a top dressing, mixed into potting soil, or brewed as compost tea. We’ll show you how to apply this black gold to boost plant growth and soil health in our next section.
Application Methods for Plants and Soil
Worm castings offer amazing benefits for plant growth in organic gardening. We can use these nutrient-rich materials in several ways to boost soil enrichment and garden maintenance.
- Direct soil application – Mix one cup of worm compost per plant around the base. This method helps plants absorb nutrients slowly over time.
- Potting mix addition – Replace 10% of your growing media with worm castings. This creates a perfect environment for strong root development.
- Seed starting – Add a thin layer to seed trays to give seedlings a healthy start with natural nutrients.
- Top dressing – Spread a 1/4 inch layer around plants during the growing season. The nutrients wash into soil during watering.
- Worm tea brewing – Steep castings in water for 18-36 hours to make liquid fertiliser. Use this tea within hours of making it for best results.
- Compost tea spraying – Apply worm tea as a foliar spray to boost plant health. This helps plants fight off pests and diseases.
- Transplant hole preparation – Place a handful in planting holes before adding new plants. This reduces transplant shock and speeds growth.
- Lawn treatment – Spread thinly over grass areas to improve soil life and turf health. The castings work their way down with rain.
- Soil amendment – Mix into garden beds before planting to boost microbial activity. This improves the soil food web for better plant health.
- Mulch mixing – Combine with organic mulches to add extra nutrients as the mulch breaks down. This creates a slow-release feeding system.
Benefits of Vermicompost as a Fertiliser
Vermicompost works as a top-notch fertiliser for our gardens. It creates humus, which feeds plants with rich nutrients they need to grow strong. Our plants love this natural food because it helps fight off pests and bad germs without harsh chemicals.
The soil gets packed with helpful tiny bugs that make the ground healthy.
We mix just 10% vermicompost with our potting soil for the best results. This small amount makes a big difference in how well plants grow. Garden soil gets better structure, holds water well, and drains properly with this eco-friendly boost.
Earthworm castings also help flowers get more visits from bees and other pollinators. Next, let’s look at how to use this amazing garden helper in different ways.
Common Challenges and Troubleshooting
Worm bins can face problems like bad smells, pests, or unhappy worms. We’ll teach you how to spot early signs of trouble and fix them fast. Read on to learn how to keep your worm farm happy and healthy!
Overfeeding or Underfeeding Issues
Feeding your worms the right amount is key to a healthy worm bin. We need to watch for signs of too much or too little food to keep our worms happy and working well.
- Too much food leads to bad smells and fruit flies in your bin.
- New worm bins should get food equal to only 25% of the worms’ weight in the first week.
- Excess food rots before worms can eat it, making the bin too wet.
- Rotting food creates leachate, a smelly liquid that harms worms.
- Food piled too high blocks air flow and causes bad odours.
- Signs of overfeeding include many fruit flies and a strong smell.
- Not enough food makes worms thin and less active.
- Hungry worms may try to escape the bin to find more food.
- A good rule is to feed only when most of the last meal is gone.
- Small, chopped food scraps help worms eat faster and prevent overfeeding issues.
- Check your bin weekly to see how fast the worms eat.
- Food that sits for more than a week means you’re giving too much.
- In cold weather, worms eat less, so cut back on feeding.
- In warm weather, worms eat more and need extra food.
Now let’s look at other common problems you might face with your worm bin and how to solve them.
Managing Other Critters in the Bin
Worm bins can attract unwanted guests that might disrupt your composting system. We need to address these pest issues quickly to keep our vermicomposting healthy and efficient.
- Ants often appear in dry worm bins, showing your bedding needs more moisture. Mist the bin with water to raise humidity levels and deter these pests.
- Fruit flies buzz around bins due to overfeeding or exposed food scraps. Cover new food with a layer of bedding to block their access to waste.
- Tiny white mites may appear but rarely harm worms. These creatures help break down organic waste and usually indicate a slightly wet bin.
- Centipedes can prey on your worms and must be removed by hand when spotted. Check your bin weekly for these unwanted predators.
- Slugs and snails enter outdoor bins and compete with worms for food. Place copper tape around bin edges as a natural barrier against these visitors.
- Bin odours attract pests, so maintain proper air flow by drilling extra holes if needed. Fresh air stops smells that draw insects to your compost.
- Food scraps left on top create pest problems. Bury all waste under 2-3 cm of bedding to limit pest access and speed up decomposition.
- Overfeeding causes leachate, fruit flies, and foul odours that attract more pests. Feed worms only what they can eat in 2-3 days.
- Bin location affects pest issues. Keep indoor bins away from windows and outdoor bins raised off the ground to reduce pest entry points.
- Natural pest control works best for worm bins. Diatomaceous earth sprinkled around (not in) the bin deters crawling insects without harming worms.
Preventing Worm Bin Failure
We want to help you keep your worm bin healthy and active. A good vermicomposting system needs proper care to avoid common problems that can cause it to fail.
- Check moisture levels daily. Too much water creates anaerobic conditions where worms can’t breathe and may try to escape.
- Balance wet and dry materials in your bin. Add dry bedding like shredded paper if you notice excess moisture or leachate forming.
- Monitor the temperature of your bin. Worms work best between 15-25°C and may die if exposed to extreme heat or cold.
- Avoid overfeeding your worms. Food waste should be gone before adding more to prevent rotting and bad smells.
- Chop food scraps into small pieces. This speeds up decomposition and makes it easier for worms to process.
- Keep acidic foods like citrus and onions to a minimum. These can make the bin too acidic for worms to thrive.
- Place your bin in a sheltered spot away from direct sunlight. Hot spots can kill worms and cause bin failure.
- Ensure proper air flow through the bin. Oxygen is vital for both worms and helpful microorganisms.
- Protect your bin from pests like rats and flies. Cover food scraps with bedding and keep the lid secure.
- Drain excess leachate regularly. This liquid is not worm tea and can harm your bin if left to pool at the bottom.
- Harvest compost on schedule. Overfilled bins become hard to manage and may develop problems with decomposition.
- Use a proper worm-to-waste ratio. Start with about 1kg of worms for every 4kg of weekly food waste.
Large-Scale Vermicomposting Opportunities
Large-scale vermicomposting offers big chances for farms and businesses. You can grow worms to sell or make tons of compost for sale to local gardeners.
Commercial Vermicomposting Methods
Commercial vermicomposting turns waste into gold on a big scale. We can help businesses process tonnes of organic waste through several proven methods.
- Windrow systems stack organic waste in long piles outdoors. These systems need less money to start but require more manual work to maintain.
- Continuous Flow Through (CFT) systems use special beds with mesh bottoms. Worms work from the bottom up, making harvest easier as finished compost falls through the mesh.
- CFT systems cost at least £5,000 to set up but save labour costs over time. The high upfront cost pays off through faster processing and less manual sorting.
- Automated temperature control systems keep worms happy in large operations. These systems prevent worms from getting too hot or cold as piles heat up.
- Mechanical screeners separate worms from finished compost quickly. This equipment boosts efficiency for high-volume waste processing.
- Rotating drum systems mix and aerate waste without hurting worms. The drums turn slowly to blend materials while keeping oxygen levels high.
- Stacked tray systems save space by growing up instead of out. These work well in urban areas where floor space costs more.
- Pre-composting areas help break down tough materials before worms get them. This step speeds up the whole process for industrial-scale operations.
- Leachate collection systems catch liquid runoff for use as plant food. This turns a potential problem into another valuable product.
- Odour control systems use biofilters to keep large operations neighbour-friendly. These systems trap smells that might cause complaints.
Next, we’ll explore how to use the rich vermicompost you’ve made in your garden for amazing results.
Equipment Needed for Mid- to Large-Scale Operations
Now that we’ve explored commercial vermicomposting methods, let’s focus on the specific equipment needed for larger operations. The right tools make a big difference when scaling up from home bins to commercial systems.
- Trommels are rotating mesh cylinders that separate worm castings efficiently. We can build DIY versions for just £40-£50, making them great starter equipment.
- Continuous Flow Through (CFT) systems allow for ongoing harvesting without disturbing worms. These systems start at £5,000 but pay off through higher production rates.
- Worm casting separators use light to drive worms downward while collecting the valuable castings above. These tools save countless hours of manual sorting.
- Rotary sieves help screen finished compost to create uniform products. The mesh size can be changed based on your end product needs.
- Industrial-grade shredders process food waste and bedding materials quickly. These machines cut preparation time and create ideal-sized materials for worms.
- Moisture meters track water levels in large systems. Proper moisture control prevents worm stress and ensures top production.
- Temperature monitoring systems alert staff to dangerous heat levels. Worms need specific temperature ranges to thrive and reproduce.
- Large-scale bedding preparation equipment processes materials like cardboard and paper. This gear turns waste into perfect worm habitats.
- Harvesting conveyors move finished castings from bins to packaging areas. These systems reduce labour costs and back strain.
- Packaging equipment fills bags or containers with finished vermicompost. Proper packaging extends shelf life and creates retail-ready products.
Conclusion
Vermicomposting offers a simple way to turn kitchen scraps into gold for your garden. Your plants will thank you with better growth while you help cut waste going to landfills. The worms do most of the work, leaving you with rich compost that feeds your soil naturally.
Starting a worm bin takes little space and gives big rewards for any garden size. Join the growing number of gardeners who use this eco-friendly method to grow healthier plants and support our planet.